1.首先为 聊天服务器(Chat)定义google protobuf的协议接口文件
接口主要遵循 Request、Response、Notification(Indication),Command(本文未出现)四大消息分类,并且使用Message顶层消息把Request、Response,Notification等包含起来;并定义一个MSG枚举值,用于表示具体的消息值(在google protobuf RPC过程中,其实 每个service方法就是一个Request和Response的应答对,只不过其消息值的编码是RPC自动分配的)
|
1 2 3 4 5 6 7 8 9 10 11 12 13 14 15 16 17 18 19 20 21 22 23 24 25 26 27 28 29 30 31 32 33 34 35 36 37 38 39 40 41 42 43 44 45 46 47 48 49 50 51 52 53 54 55 56 57 58 59 60 61 62 63 64 65 66 67 68 69 70 71 72 73 74 75 76 77 78 79 80 81 82 83 84 85 86 87 88 89 90 |
package chat; //定义protobuf的包名称空间,对应C++,C#的nanmespace,Java的package enum MSG { Login_Request = 10001; Login_Response = 10002; Logout_Request = 10003; Logout_Response = 10004; Keepalive_Request = 10005; Keepalive_Response = 10006; Get_Friends_Request = 10007; Get_Friends_Response = 10008; Send_Message_Request = 10009; Send_Message_Response = 10010; Friend_Notification = 20001; Message_Notification = 20002; Welcome_Notification = 20003; } /*下面定义具体的消息内容,MSG枚举中的每个消息ID,如果有消息体,则会对应一个message 定义,如果无消息体则不必要*/ /*Login_Request 消息ID对应的消息名称为LoginRequest ; 规则为取掉下划线,有利于某些自动化编码工具编写自动化代码*/ message LoginRequest { required bytes username = 1; optional string password = 2; } message LoginResponse { required fixed32 ttl = 1; } /*没有对应的MSG id,则为其它 消息的字段,作为子消息,可以消息嵌套定义,也可以放在外面,个人习惯放在外部。*/ message Friend { required bytes name = 1; optional bool online = 2; } message GetFriendsResponse { repeated Friend friends = 1; } message SendMessageRequest { optional bytes receiver = 1; required bytes text = 2; } message FriendNotification { required bytes name = 1; optional bool online = 2; } message MessageNotification { required bytes sender = 1; required bytes text = 2; required string timestamp = 3; } message WelcomeNotification { required bytes text = 1; } /*请求消息集合,把所有的 XxxxxRequest消息全部集合在一起,使用起来类似于C语言的联合体,全部使用optional字段,任何时刻根据MSG 的id值,最多只有一个有效性, 从程序的逻辑上去保证,编译器(不管是protoc还是具体语言的编译器都无法保证)*/ message Request { optional LoginRequest login = 1; optional SendMessageRequest send_message = 2; } /*与Request作用相同,把所有的XxxxResponse消息集合在一起,当作联合体使用,不过额外多了几个字段用于表示应答的结果*/ message Response { required bool result = 1; //true表示应答成功,false表示应答失败 required bool last_response = 2;// 一个请求可以包含多个应答,用于指示是否为最后一个应答 optional bytes error_describe = 3;// result == false时,用于描述错误信息 optional LoginResponse login = 4; optional GetFriendsResponse get_friends = 5; } /*与Request相同,把所有的XxxxxNotification消息集合在一起当作联合体使用.*/ message Notification { optional FriendNotification friend = 1; optional MessageNotification msg = 2; optional WelcomeNotification welcome = 3; } /*顶层消息,包含所有的Request,Response,Notification,具体包含哪个消息又 MSG msg_type字段决定,程序逻辑去保证msg_type和具体的消息进行匹配*/ message Message { required MSG msg_type = 1; required fixed32 sequence = 2;//消息系列号,主要用于Request和Response,Response的值必须和Request相同,使得发送端可以进行事务匹配处理 optional fixed32 session_id = 3; optional Request request = 4; optional Response response = 5; optional Notification notification = 6; } |
2.工程实例
服务器和客户端均使用C#语言开发,主要是考虑到Net集成的网络框架使用起来比较方面,做实例工程比较快;
google protobuf官方的第三方支持库下载protobuf的NET版本
具体工程文件可以从此下载: http://download.csdn.net/detail/chenxiaohong3905/7654087
通信模式采用TCP,在protobuf的二进制基础上追加了 4个字节的包头,用于表示protobuf 二进制数据的长度(不包含4字节自身)
3. wireshard 抓包分析
普通的wireshark版本是不支持protobuf抓包解析的,可以下载http://download.csdn.net/detail/chenxiaohong3905/7244655 版本(需要10 CSDN积分,后面要取消,无法取消积分,上传新的文件也没资格了)
安装完下载的版本后需要对齐进行配置 在wireshark安装目录下有个protobuf的文件夹用于存放所有 要解析的protobuf文件和配置;
注意事项: 每一个端口只能对应一个顶层消息 ,至于为何每个端口只能有一个顶层消息可以去cnblog参考陈硕的文章,里面关于protobuf的描述已经解释了这个问题; protobuf 文件可以包含其它protobuf接口文件,会自动加载,配置的时候只需要指定顶层消息所在的proto文件即可;
里面vcs.conf是一个配置实例
对于 聊天服务器的配置可以如下:
把 protocol.proto文件复制为 wireshark/protobuf文件夹下面,并穿件一个 文件 protocol.conf 输入一下内容即可
|
1 2 3 4 |
# same config file for parsing Message messages name = Message proto_file = protocol.proto port = 39999 |
name 为顶层消息的名称, port为源或目标的端口之一,不管是TCP,UDP都会尝试解析;如果port端口有其它协议优先注册了,则无法解析为protobuf,需要手动解析;
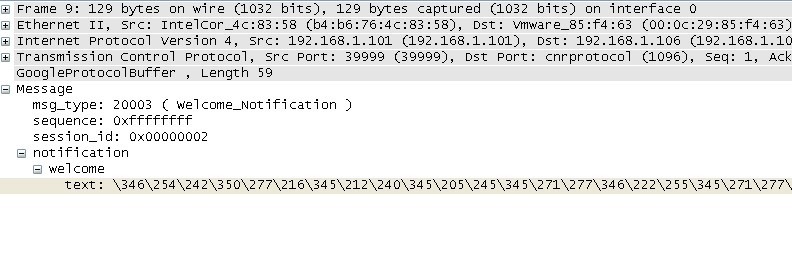
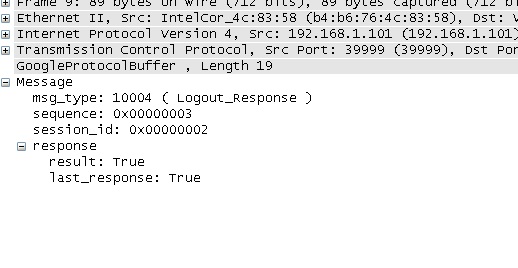
3.1 连接建立 , 服务器推送 Welcome_Notification消息到客户端
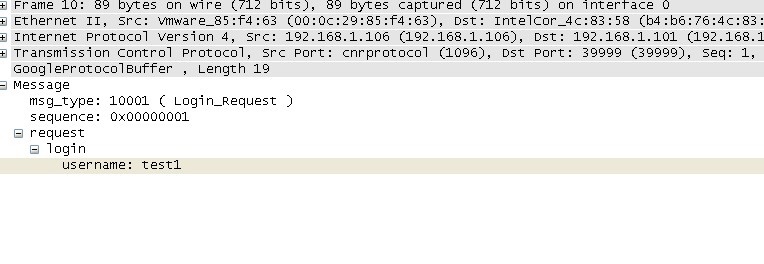
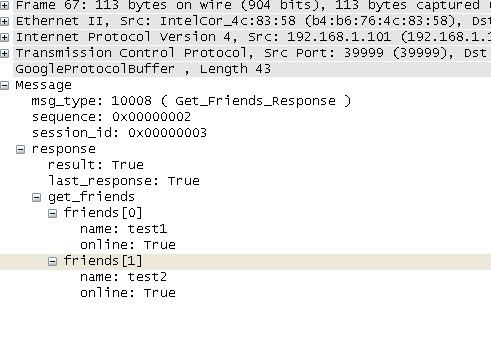
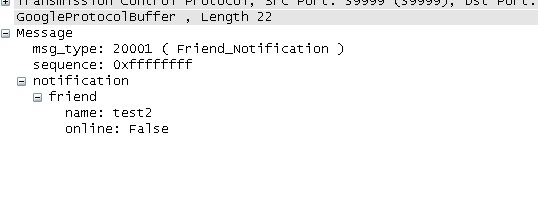
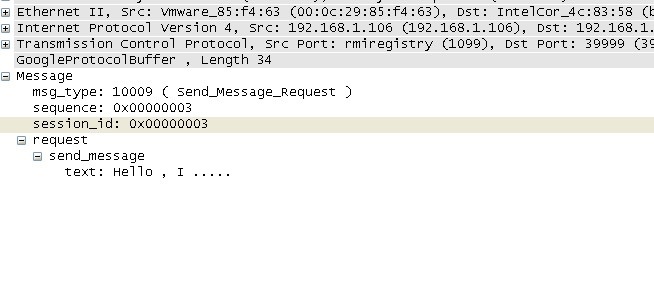
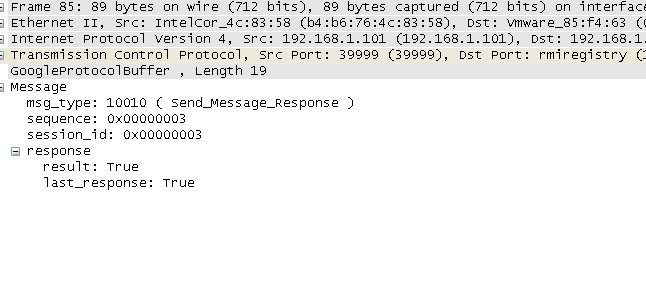
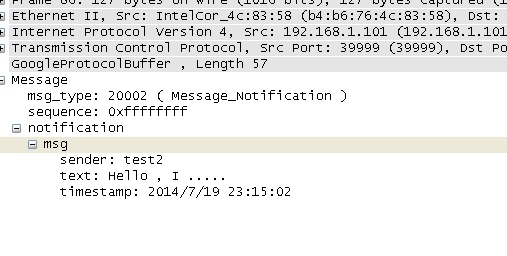
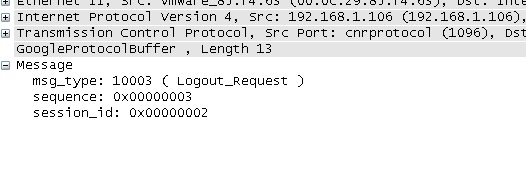
GoogleProtocolBuffer , Length 59 描述了 Message 消息二进制的总长度



发表评论
要发表评论,您必须先登录。